Joomla 4 Workflow explained
The content is an essential part of the website due to many factors, including the impact on the conversion from visitors to the website to customers or the website's position in rankings, i.e., SEO.
Joomla 4 brings a significant change for managing the articles and blog on the website - it introduces a new workflow. Let's focus on this new feature: Workflows. Using it gives the possibility to approve content before it's published.
In this blog post, we’ve used a simple example of introducing the idea behind Workflow. We've created it for the case when the "Guest author" user (from the guest posts group) adds new content, and it has to be checked by an authorized user before it is published.
The website admin (in our case, it is the "Content team" user) is notified by email about the newly added article. He can decide what happens next, perform the appropriate action, e.g. delete the article or publish it.
For this purpose, we've used the Workflow named "New content.” It works by default for all content categories.
What is the workflow?
Workflow is a set of steps, making the website content management more effortless. The website user can create and customize a new workflow to achieve his goals. In practice, it’s like a path that the article must follow to be published. It’s about managing users’ content, scheduling articles/blogs according to your own rules and needs.
It leaves the old structure of defining the page as published / unpublished / trashed / archives and offers new options for a fresh approach using a component. Different states of articles can be grouped into categories. You can set up a new workflow, create stages, transition, and automate how articles will be published.
The new workflow includes four main elements:
- States (Defined stages of the entire process.)
- Transitions (Sequence of the article’s path must cover before it finally appears live on the page.)
- Items conditions (chosen articles conditions using the old set: published, unpublished, trashed, and archived.)
- Categories (Categories where articles are assigned.)
Why use the workflow?
The workflow is purposed for managing articles at the website. Applying the new workflow feature on the website will enhance its performance. It can play a vital role in content, mainly if it engages many guest authors interested in submitting the articles.
You should also know that your website’s better control is guaranteed by the possibility of quick content review before publication. The website’s admin can be informed each time the new article is submitted. It applies to every stage, i.e., notifications can be received from when the user submits the site until it is published.
How does it work?
Adding a new workflow is a simple task. Open your Joomla control panel, navigate to Content -> Articles -> Options -> Integration -> Enable Workflow. Set it as "Yes.”
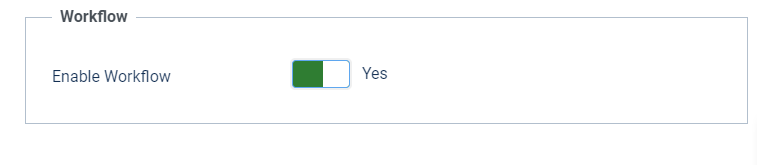
Once the workflow is enabled, it starts working.
Each new article added on the website will be a participant in the transition sequence until the final effect, the front page publication. Please note that each workflow is the implementation of an idea. It’s up to you how it will work; it can be simple and effective and long and complicated if required by the website’s proper organization.
Setting user groups
It’s time to set up two groups: the user group for guest posts users and the content team group for admins responsible for the content review. Of course, it’s just an example, and you can create other variants as well.
Navigate to “Users” -> “Groups” and choose “New.”
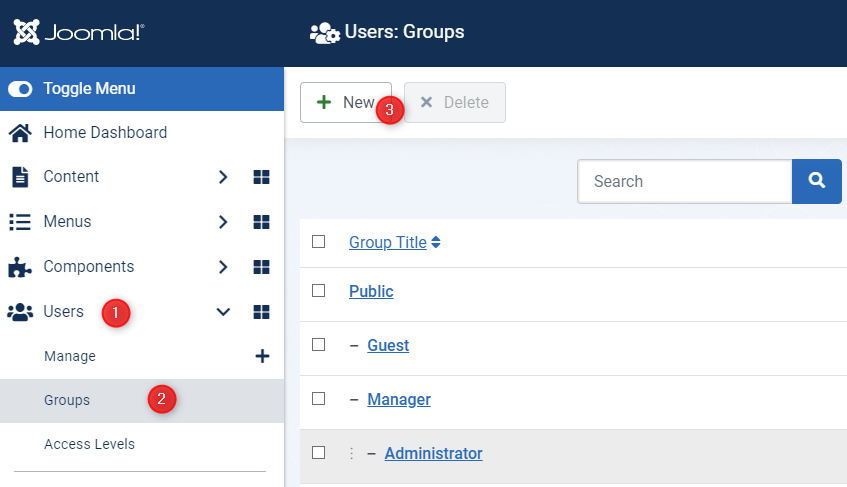
Create a new group called “Guest post” and set “Group Parent” as “Registered.”
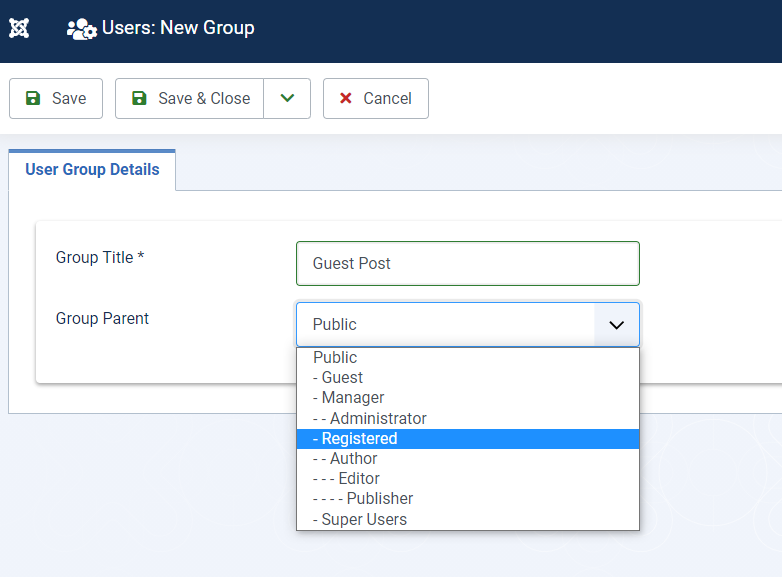
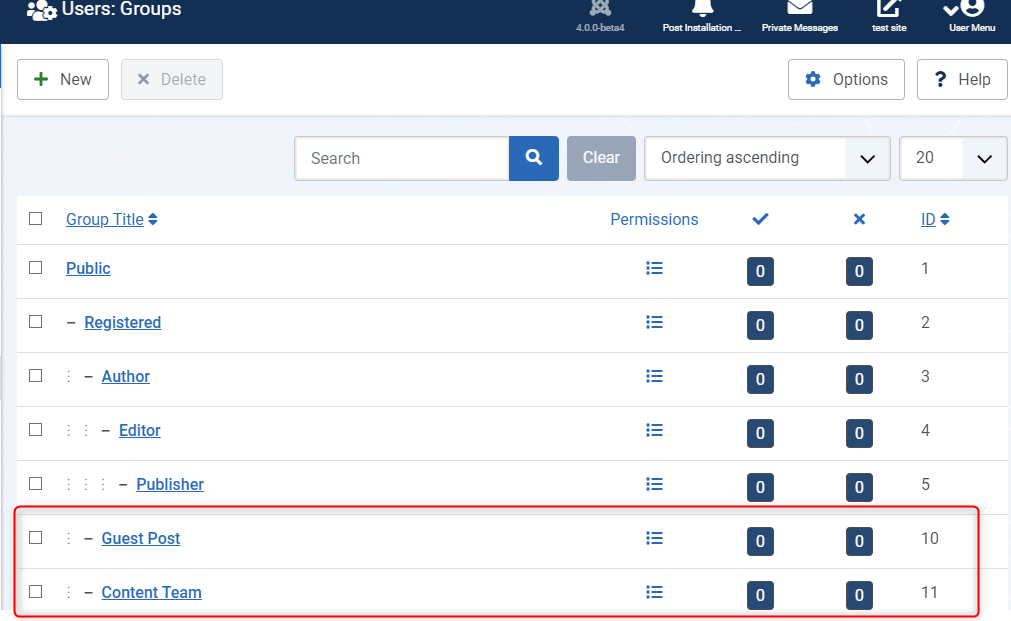
Now add a “Content Team” user group in the same way. Both groups should appear on the list of available groups.
The next step is to add a new user in the Guest Post and the Content Team groups.
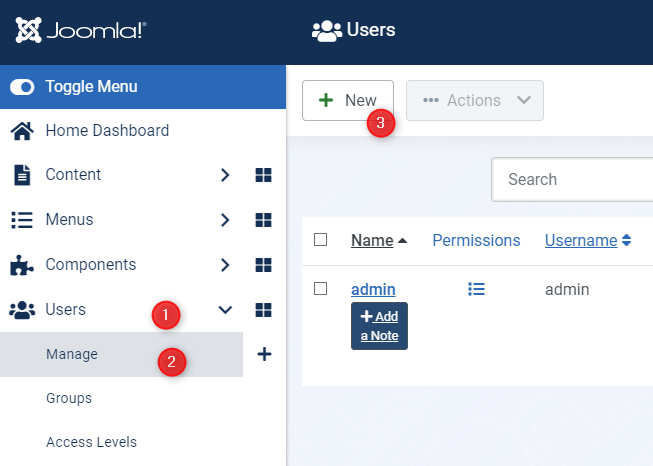
Navigate to Users -> Manage -> New.
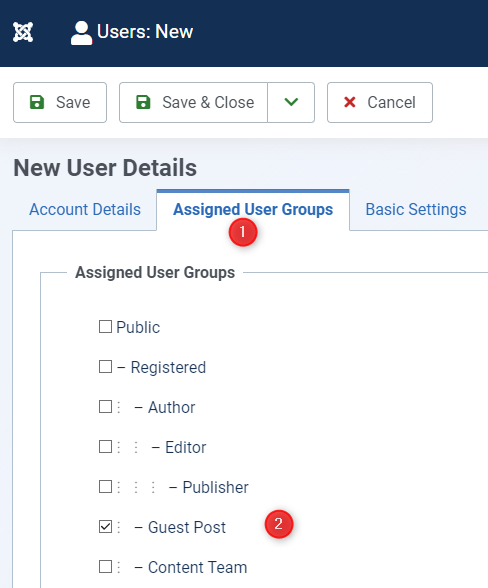
Add user details (Guest Author) and select the user group as the Guest post. You can assign it in the “Assigned User Groups “ tab.
Of course, each existing user can be edited and assigned to what group you want.
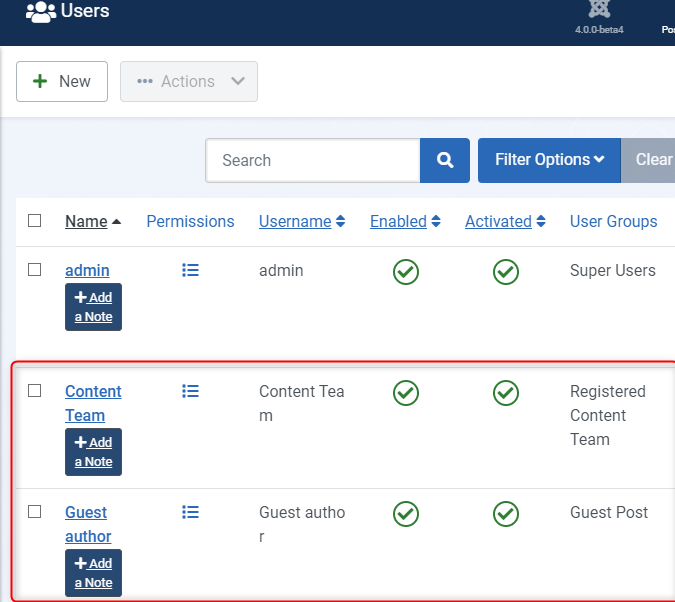
Now repeat this process for another user (“Content Team”) and assign him to the “Content Team” group.
After that, you will see both users on the list.
Notifications
The chosen user group should receive system emails. Email notifications option needs to be set as “On.” This way, the users from the selected group will be notified when a new article is added.
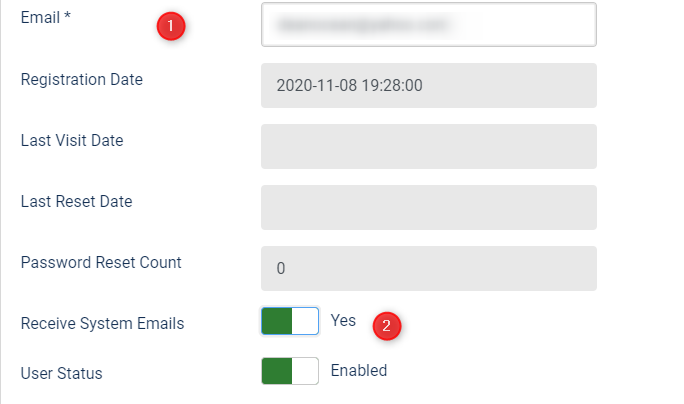
Now go to “Users.” Choose the user from the list (in this example, it’s “Content Team”) and edit the account - set the option “Receive the system emails” (2) as “On.” The user will receive an email to his defined email address (1). It can also be done during the new user registration.
Stages
You set different types of workflow that can be added in the Joomla 4 workflow. It will be selected in the Articles category to give a new filter.
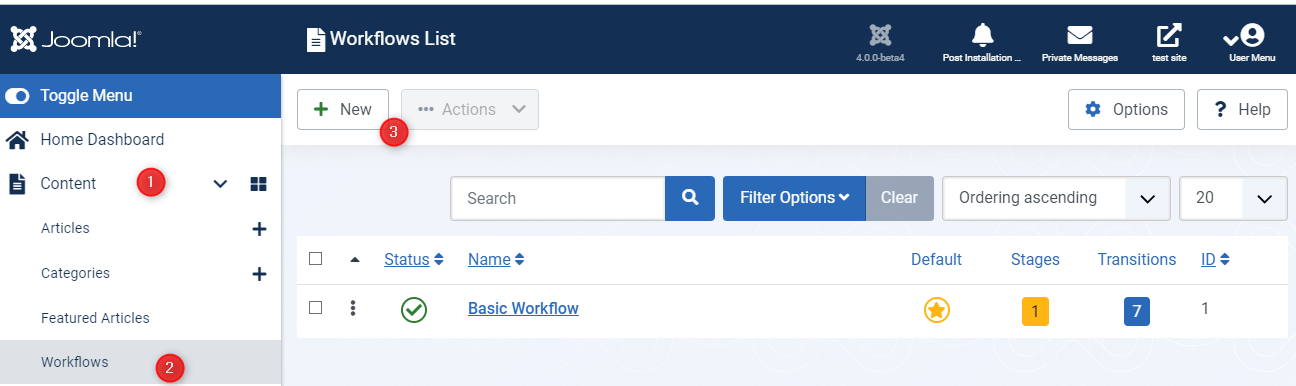
Navigate to Joomla Content (1) > Workflows (2). Create a new workflow by clicking “New.”
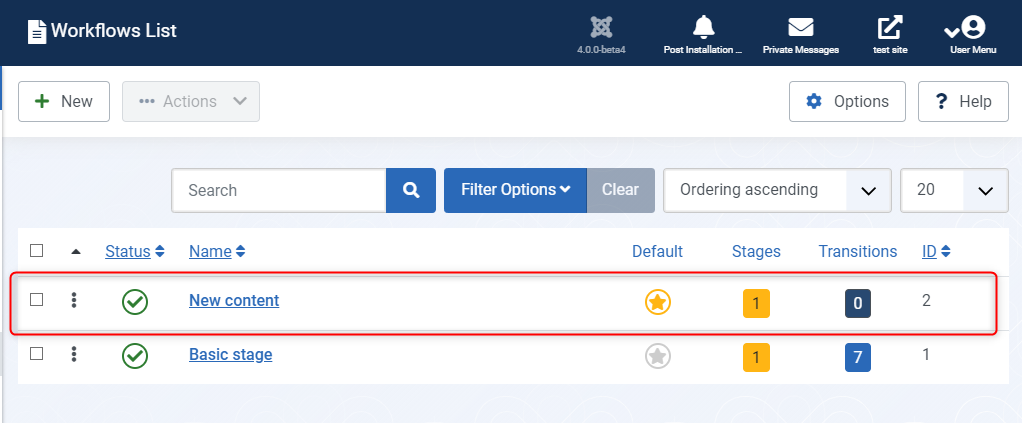
By default, Joomla comes with a basic stage workflow. Create a new workflow: “New content.” It’s now set as default.
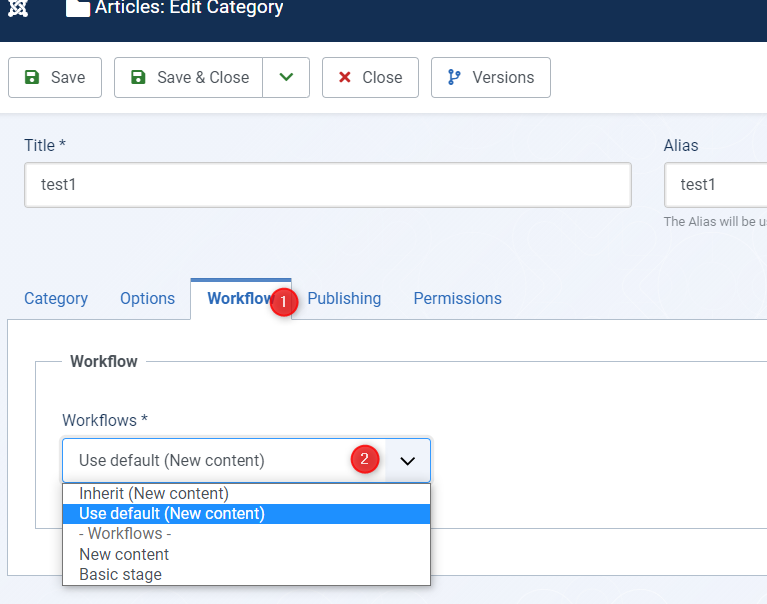
Each created workflow can be set as a default for all categories. If you want to use more workflows, you can select a chosen workflow in the selected Joomla category. Open to the Joomla category you want to edit and navigate to the “Workflow” tab. There you can choose the workflow from the list.
Transitions
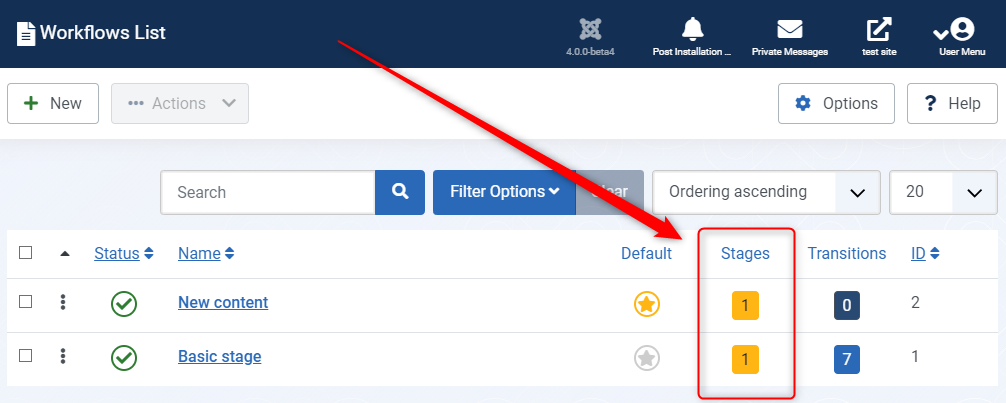
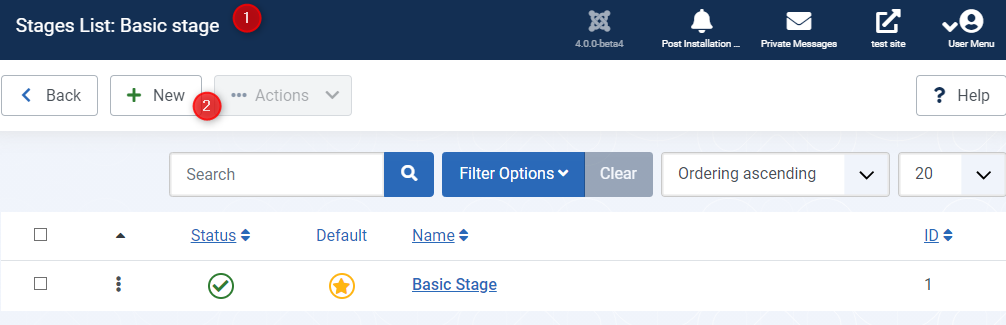
Each workflow contains the "Stages" and "Transitions" terms. The list of stages can be found in the workflows list after clicking the “Stages” button. This way, you can see how many stages exist in the current workflow.
Of course, you can create new stages as well.
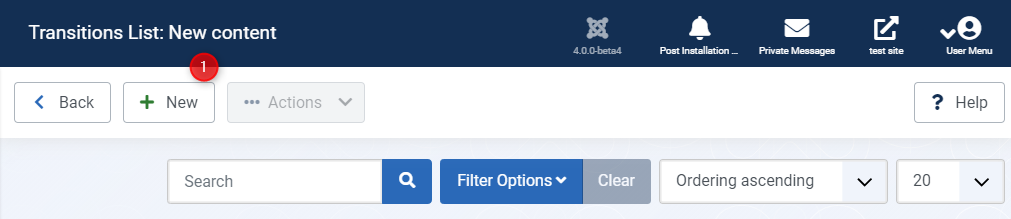
Transitions can also be found on the list of existing Workflow. Each workflow contains a list of transitions.
Click the number of transitions for the chosen workflow (New content).

Now click “New”.
Settings have four tabs:
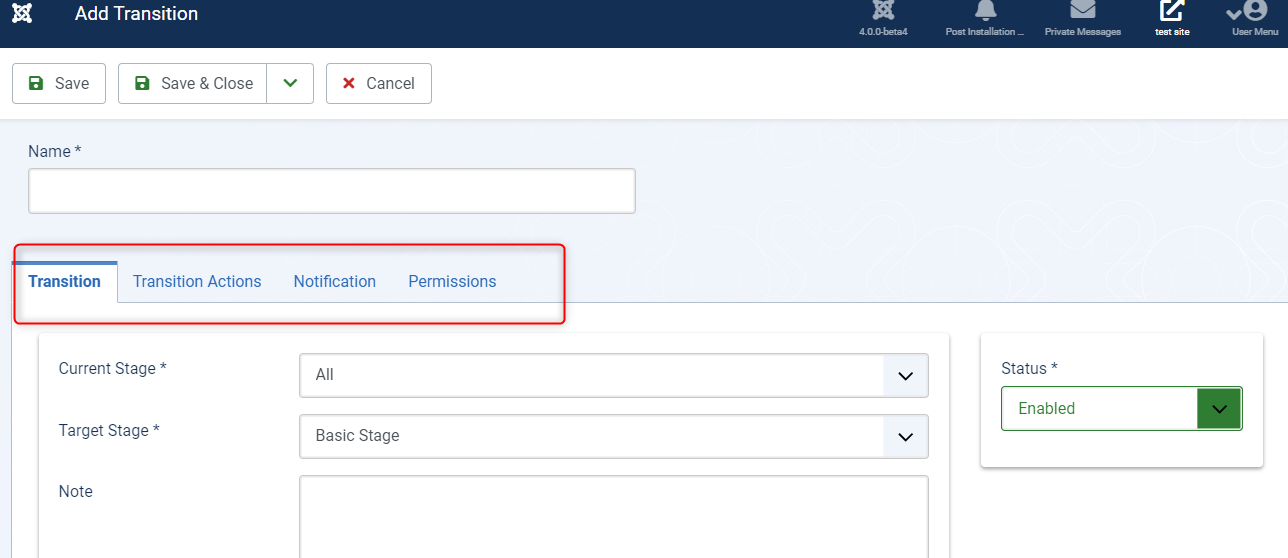
- Transition - You can select the current stage and target stage from the transition tab.
- Transition actions - In the next tab, it can set the Transition actions that can be anything as shared in the list above.
- Notification - Once the stage changes, notification will be sent. In this tab, you can add other user groups and users for notifications.
- Permissions - allows setting the access level for who can execute the transition command. As an example, we have added an Editorial team user group to approve the guest articles. We allow the execution for the Editorial user group.
They can be added or removed for the chosen workflow item. You can create a different state for each workflow and assign it to other user or user groups (including notifications.)
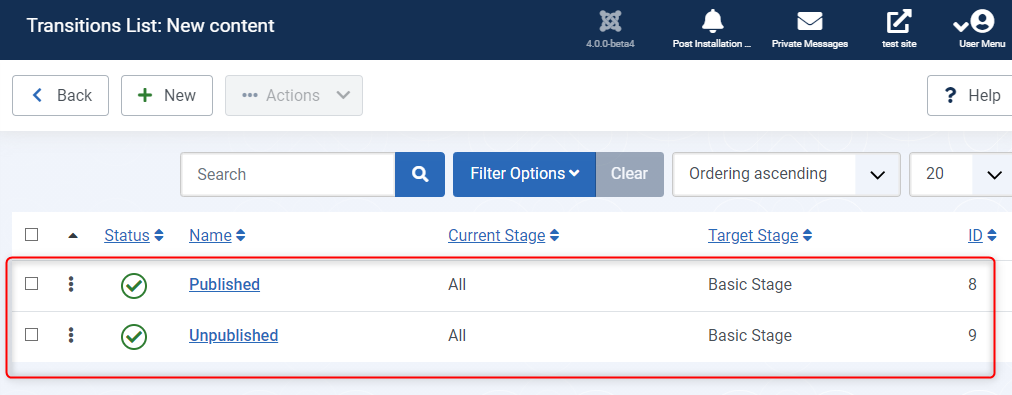
Available transitions actions are:
- Publish
- Unpublish
- Trash
- Archive
- Feature
- Publish & Feature
- Unfeature
Access
Users who will submit new articles need to have permission for that. Each user should have the correct access level. It can be set up at the “Permissions” tab. Navigate to Joomla Content -> Articles -> options -> Permission.
Here you can set the access level for chosen user groups. As an example, we have added a Content Team user group to approve guest articles. This way we allow the implementation for the Editorial user group.
Submit articles
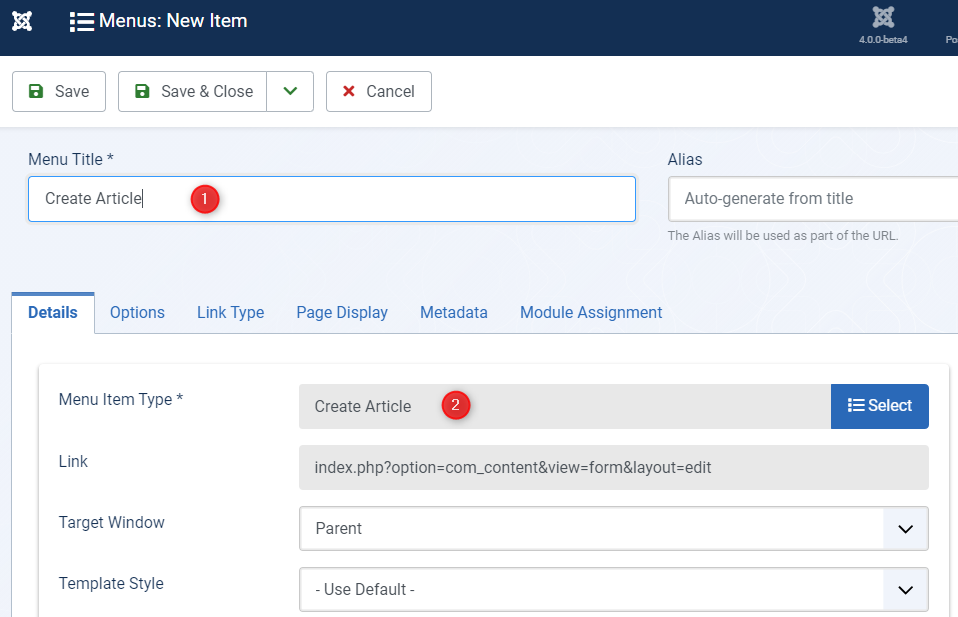
The best way to allow guest users to submit articles will be to create a menu item with a “Submit” button on the website’s frontend.
Open Menu > add new > Menu type > Article > Create Article.
Summary
Joomla 4 Workflow may not be easy to use, but learning it will allow you to control your website’s content fully. Ultimately using new opportunities, you will save time checking articles and deciding if they should be published or not. So it is a big step forward in terms of control and optimizing Joomla content publishing.