fb pixel
Skip to main content
Login

New to DJ-Extensions?

DJ-Realestate. Quickstart installation

What is Joomla Quickstart?

The Quickstart is the demo backup (.zip copy) from our demo server. It comes with Joomla, and you install it like a regular Joomla backup made by Akeeba Backup; after that, you get the same effect on our demo pages.
You do not need to configure everything from scratch; the installation is easy and will take a few minutes only.
It means Joomla quickstart includes:
  • all Joomla files
  • all extensions ours that are used on a demo site (excluding Yootheme PRO, which you must purchase separately) 
  • sample data (includes configuration, extensions, content etc.)
  • an installed and configured template styles

Attention!

Yootheme Page Builder is required for proper system operation, which must be purchased and downloaded from https://yootheme.com/page-builder. Yootheme Page Builder is a commercial component from a third party and cannot be bundled with our extensions due to proprietary rights.

Let's see how to install the Joomla quickstart

Upload

Upload the quickstart package to your server.  You can save time by uploading the compressed file and then uncompressing it on the server (if your server allows it to). You can also uncompress the file on your desktop and then upload them using FTP.

Create a database

Joomla quickstart requires a database for installation. Using a cPanel server, use the MySQL Database Wizard to setup.
If your hosting provider does not use cPanel, you'll need to contact them and ask to create a new database.
Create your database name, database username, and database password. This information will be necessary later during the installation.

Installation

Run the installation script by typing your website address with quickstart.php in your browser and the installation process will begin.
Quickstart is a backup made with Akeeba Backup. So use the current manual to go through the restore backup procedure.
You will find it at this url - https://www.akeeba.com/documentation/akeeba-kickstart-documentation.html. This is a complete recovery script instruction from Akeeba Backup

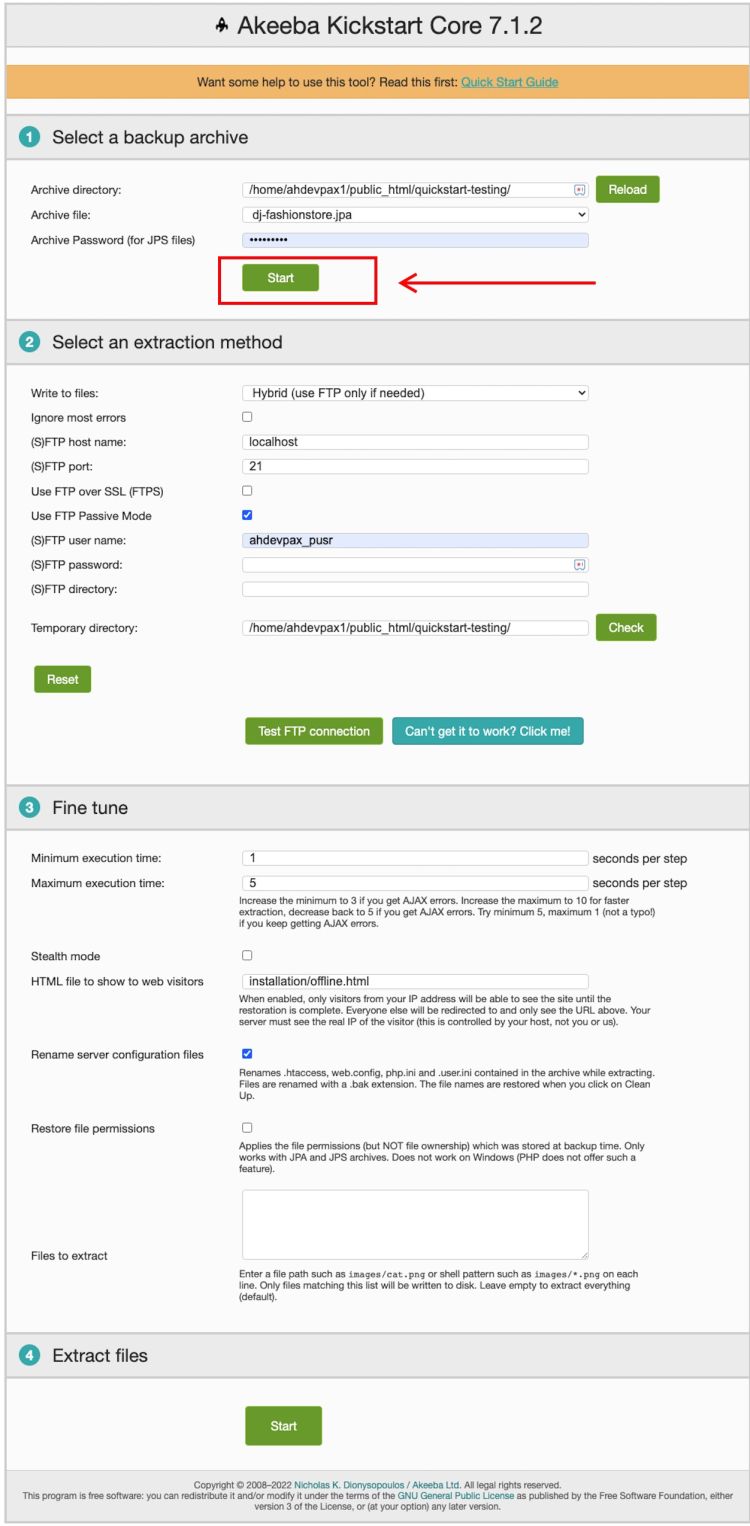
1. The first step is relatively easy. Just click start.
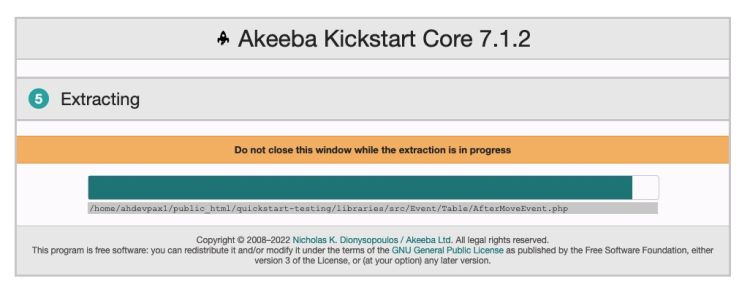
2. All archive files will be extracted from your server
3. After extracting the files, you can start the installation. Just click "Run the Installer."
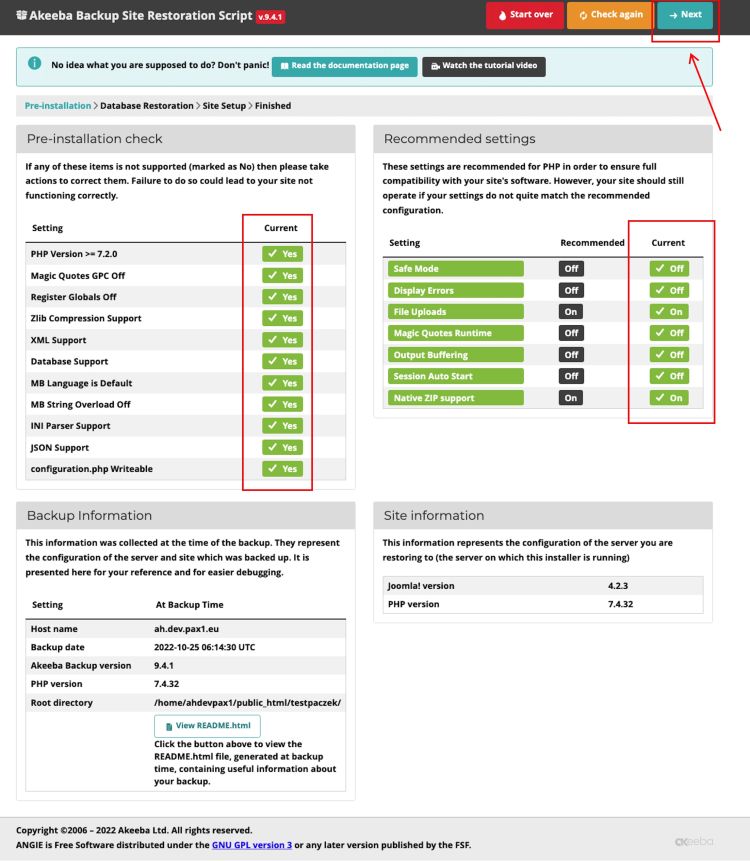
4. Next is the pre-installation check. Make sure your server settings are correct. If not, correct them or contact your hosting provider. If so, click "Next" to go to the next step.
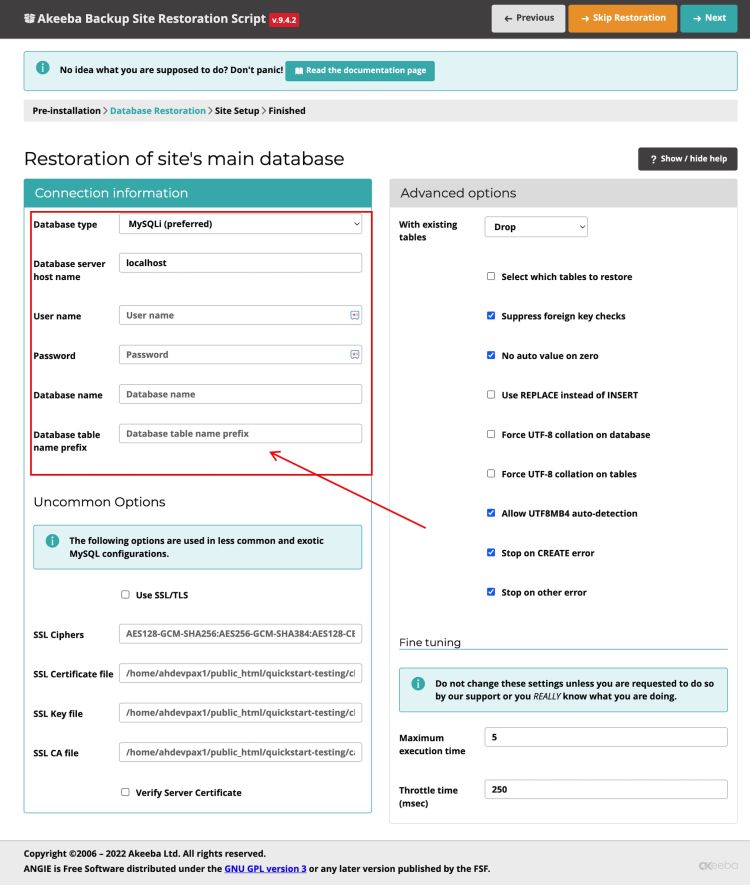
5. Now, you need to configure the database. Complete the following fields:
Database type: you can leave it unchanged
Database server hostname: usually localhost, otherwise enter a valid value on your server
User name: Enter the database user name
Password: Enter the password of the database user
Database name: Enter the name of the database
Database table name prefix: Change the table name prefix. It should have an underscore at the end. e.g. "dbx_"
Then click "Next" to go to the next step

6. Your database will be restored from the copy. Click "Next step" to proceed

7 . In this step, complete your website details:
- Site name
- Site e-mail address
- Site e-mail sender name
- Super User e-mail address
But the most important thing is that you set your website administrator password 
Click "Next" to proceed.

8. Almost there. As you can see, you have two tabs open in your browser. Close the current one.

9. Then click "Clean up" to remove unnecessary files.

10. Now, you can visit your website. Click "Visit your site's frontend."

11. As you can see, the throne is not looking very good yet. There is one more important thing you need to do

Template and configuration

1. Go to the administration panel by entering "/ administrator" at the end of the url. Then log in as "admin" using the password you set up during the installation.
2. Then go to the system tab and select Extensions in the Install section

3. Install the Yootheme Pro Page Builder downloaded previously from https://yootheme.com/page-builder

4. Now go to the System tab and select Site Template Styles from the Templates section.

5. Then set Yootheme as the default template.
6. Go to the "Home Dashboard" tab and click the Yootheme icon.
7. Now, you can see the correct page in the web builder! Of course, the front is also working properly.
8. Go to "Styles". Scroll to the end of the Yootheme Menu and click the "Recompile Style" button.