How to create events site with DJ-Events?
To meet our users' expectations, we have prepared an article where we describe how to create an online events site using DJ-Events extension.
DJ Events is the free event calendar extension for Joomla offering simplicity, flexibility, and a set of features needed for a modern events website.
With this extension, you can easily create and manage real and online/virtual events (single or recurring) and display them in the Joomla component and modules. Events can include descriptions, images, and videos.
The task of creating an events site is much easier than it seems. It does not require any coding skills or hiring outsource developers. It's that easy.
You can create online events using these four steps:
- Install DJ-Events
- Create categories
- Create events
- Publish events
Step 1 - install DJ-Events
- Download the newest version of DJ-Evens here.
- In your Joomla administrator panel, go to Extensions > Manage.
- Install DJ-Evens to your Joomla site.
Step 2 - create categories
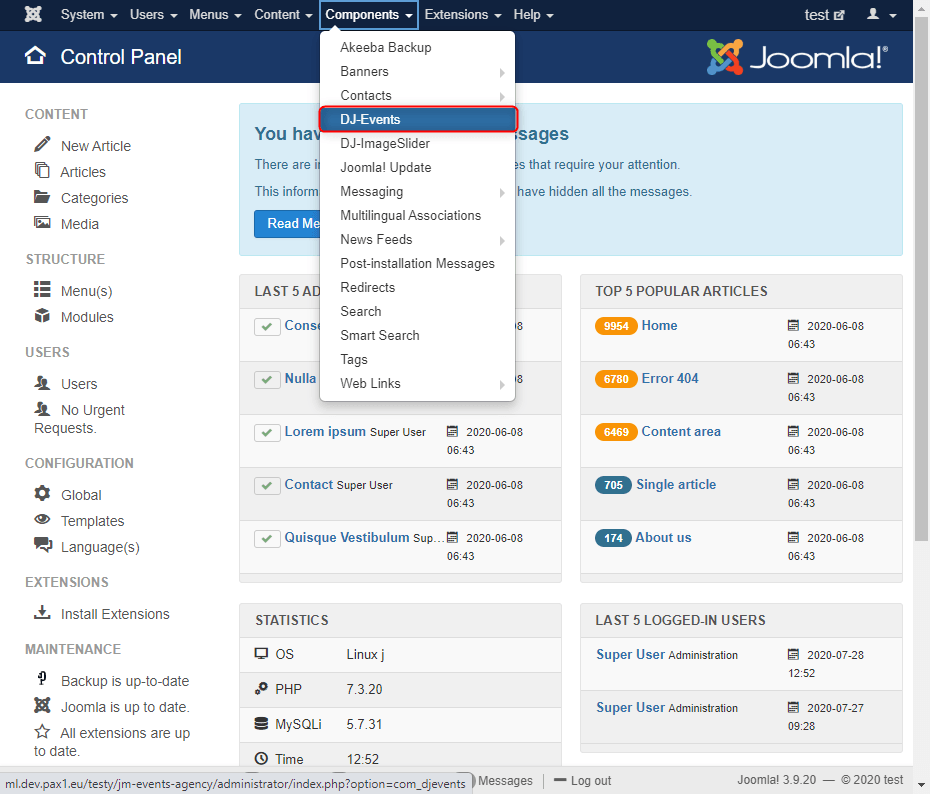
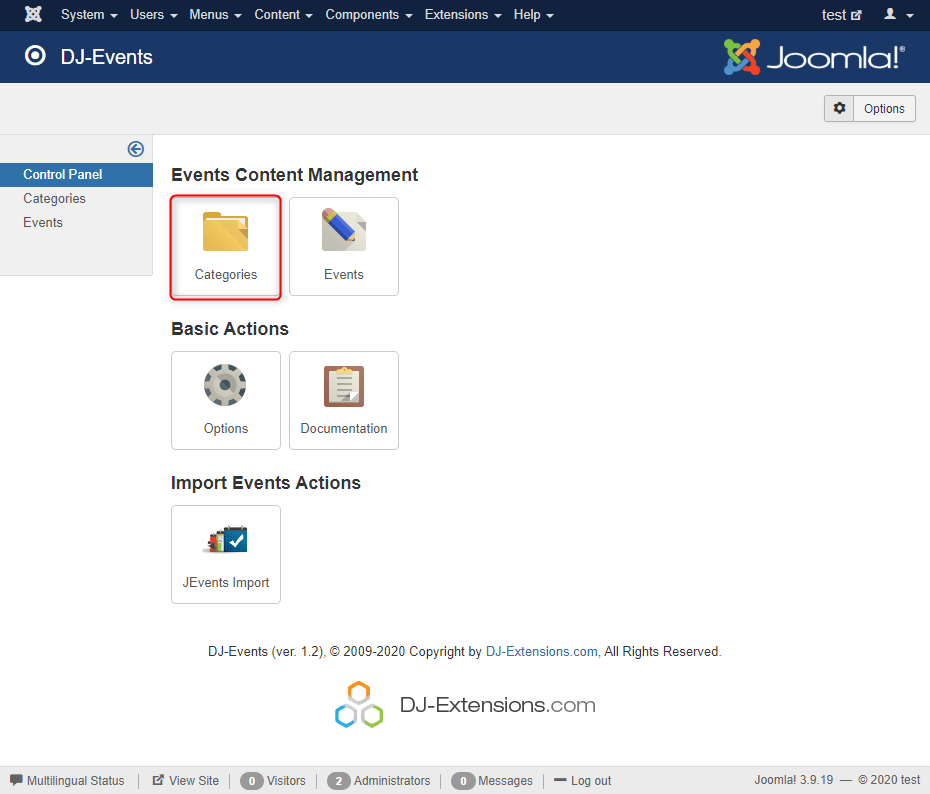
- Navigate to Components -> DJ-Events
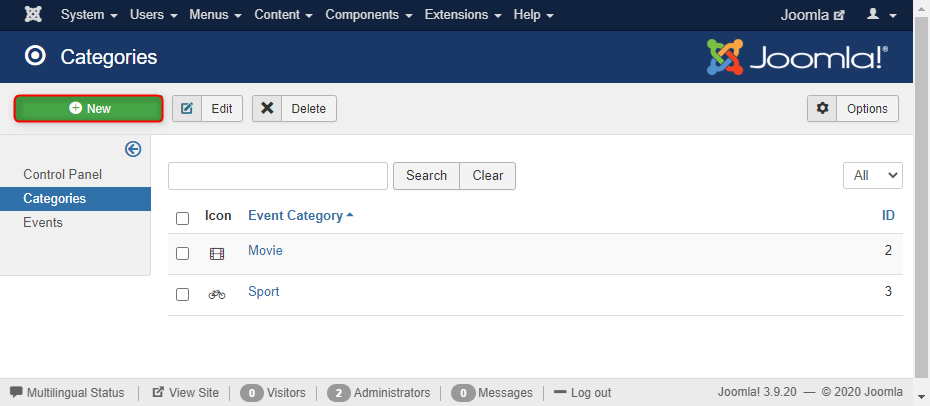
- Click on Categories
- Click on New button to add a new category
- There you need to fill some fields (fields with * are required):
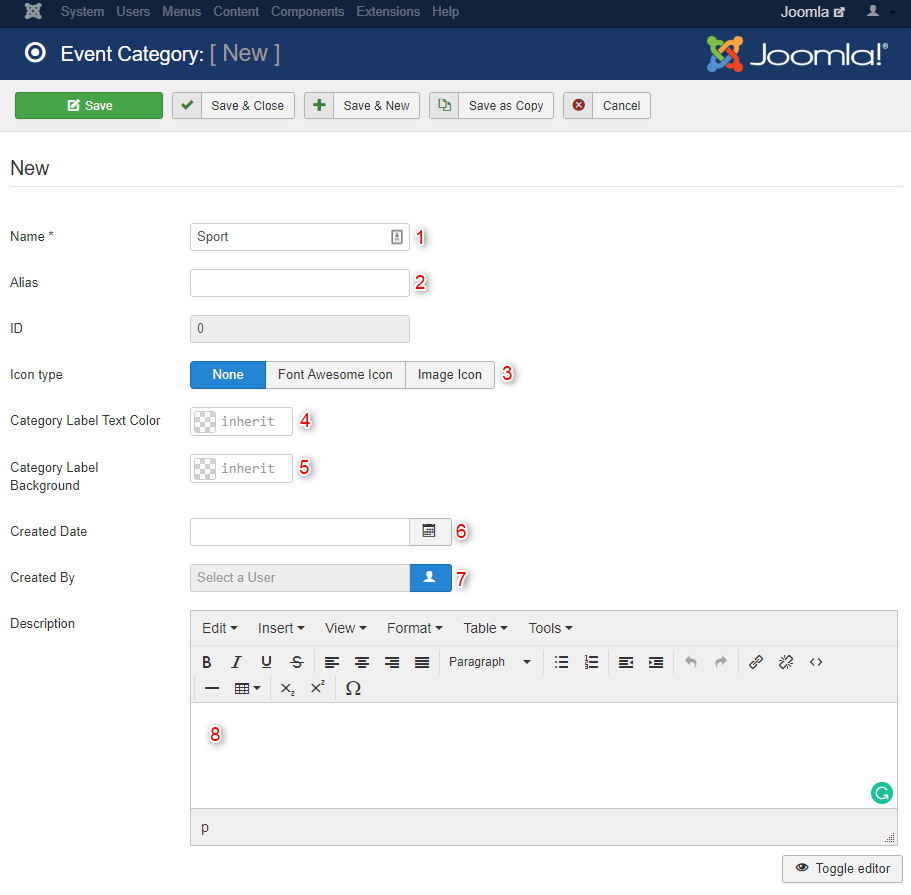
- Name - enter the name of the category
- Alias - will be used in the URL. Leave empty to create default alias from the name
- Icon type - you can add the icon to the category label. Choose the icon type here
- Category Label Text Color - choose the color for the text of the category label
- Category Label Background - choose the color for the background of the category label
- Created Date
- Created by
- Description - write category description
- Now click on Save & Close
Step 3 - create an event
- Navigate to Components -> DJ-Events
- Click on Events
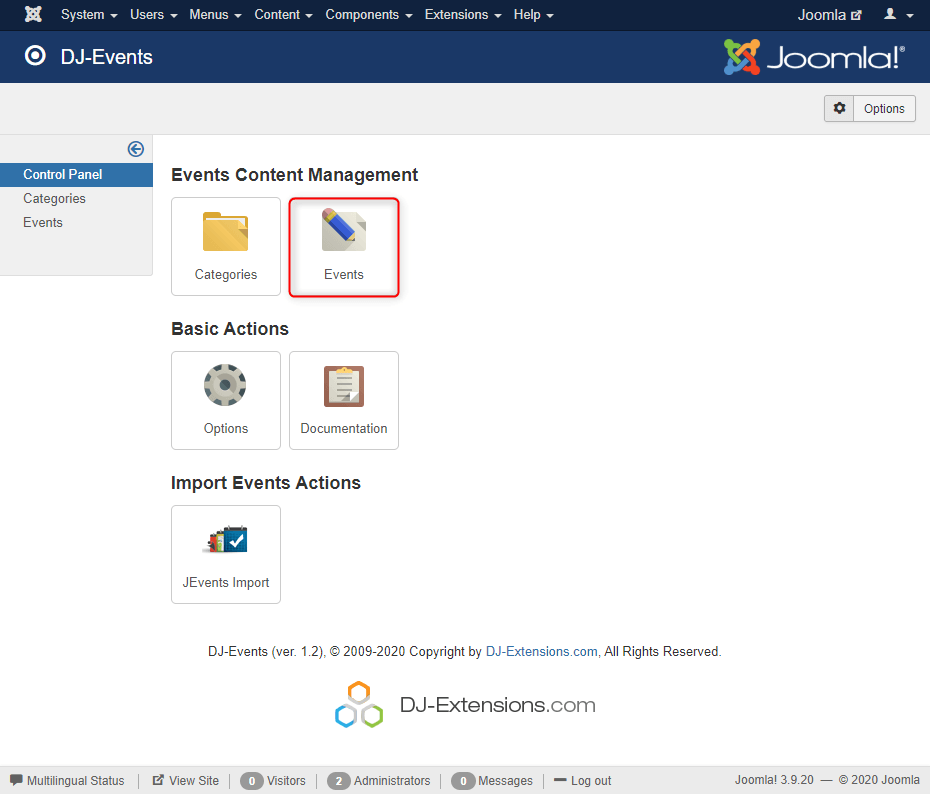
- Click on New button to add a new event

- There you need to fill some fields (fields with * are required):
Basic fields
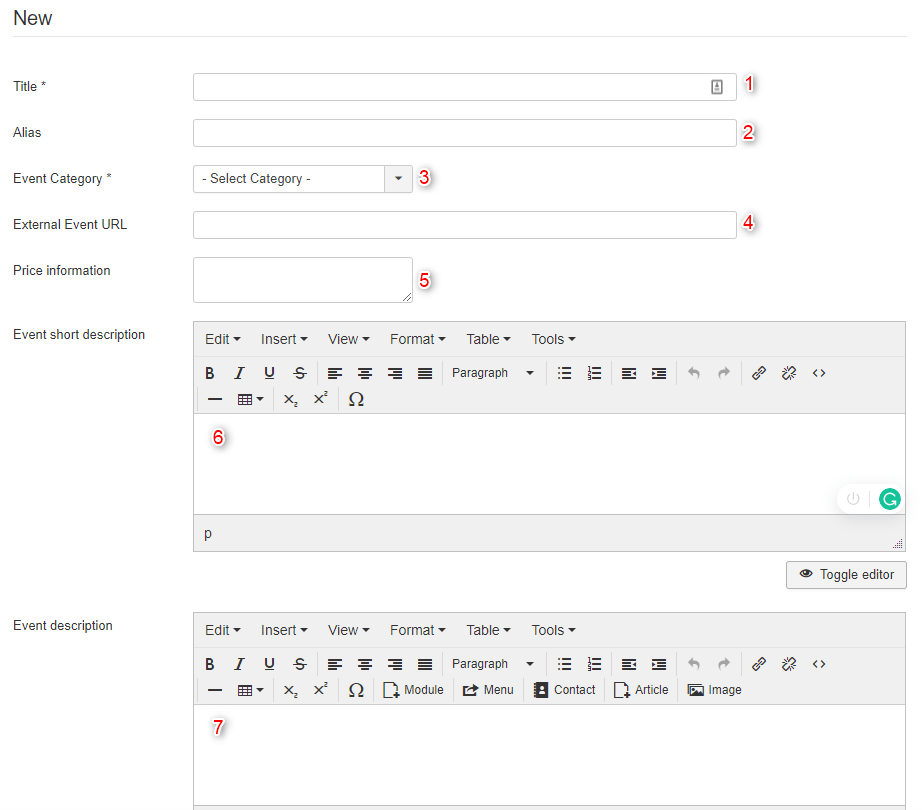
- Title - Enter the event's title
- Alias - The alias will be used in the SEF URL. Leave this blank and Joomla will fill in a default value from the title
- Event Category - select the event's category
- External Event URL - you can paste the event's external URL
- Price information - enter information about prices for participation
- Event short description - short event description is displayed on events' list
- Event description - event description is displayed in the event's details
Media
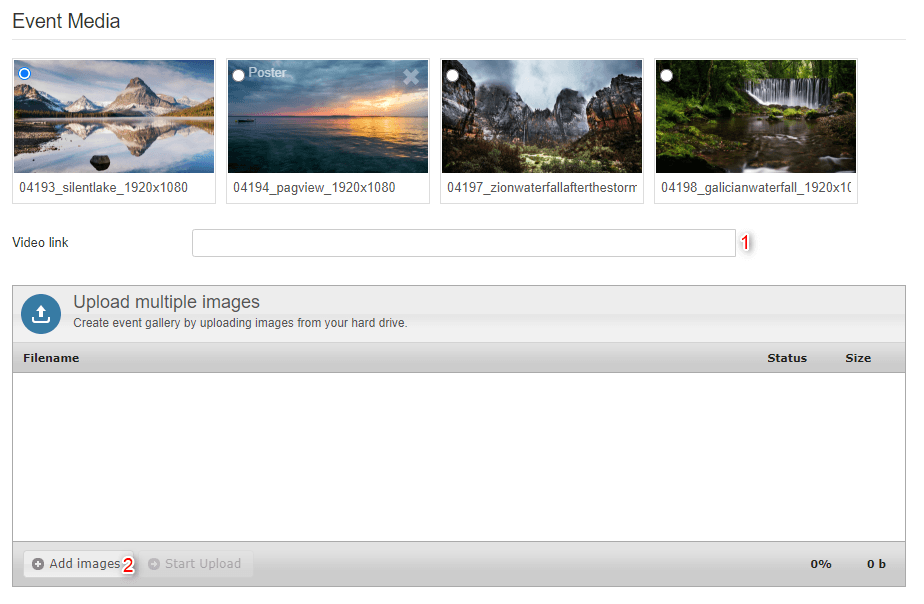
- Video link - paste the whole link starting with http:// to video on YouTube.com or Vimeo.com. The video will be played in the modal window.
- Upload multiple images - upload images to create event galleries and manage it easily with drag&drop ordering feature.
Location
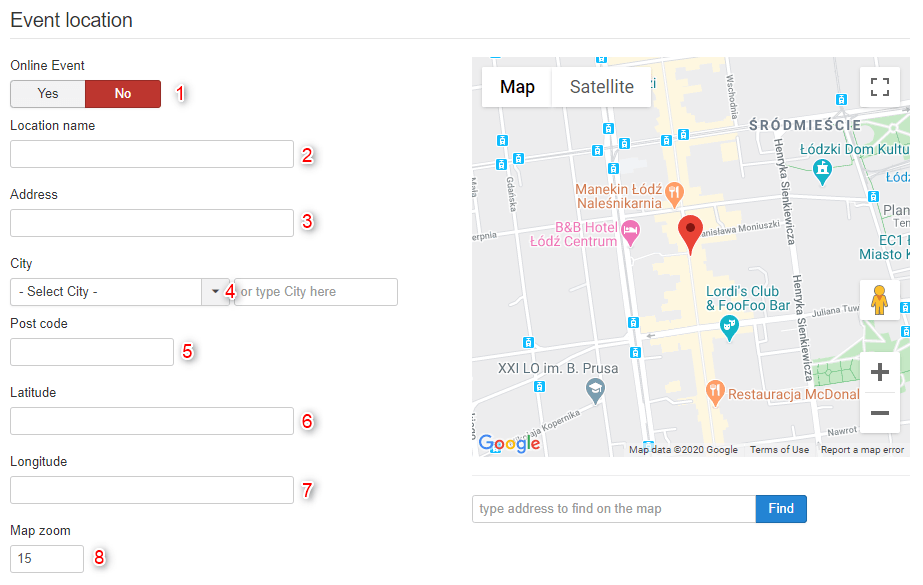
- Online event - Yes/No
- Location name - enter the location name
- Address - enter the location address
- City - type a city or select it from the list
- Postcode - type postcode
- Latitude - this field will be filled in when you select the point on the map or click "find" under the map, you can also fill in it manually
- Longitude - this field will be filled in when you select the point on the map or click "find" under the map, you can also fill in it manually
- Map zoom - set the map zoom level or just adjust it on the map and the field will be updated automatically
Date and time
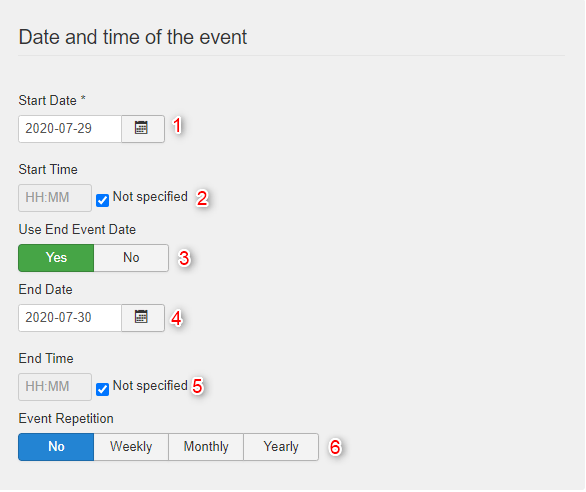
- Start Date - set the start event date using the calendar
- Start Time - optionally set the start event time
- Use End Event Date - decide if you want to set end event date and time
- End Date - optionally set the end event date using the calendar
- End Time - optionally set the end event time
- Event Repetition - use this option if you are creating a recurring event
Event Repetition
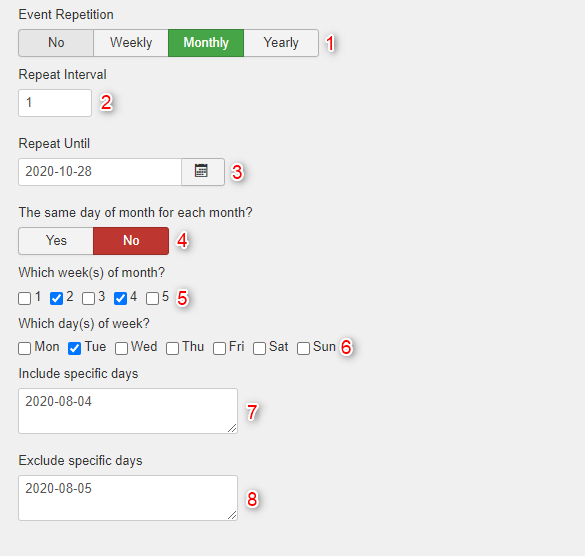
- Event Repetition - set the type of repetition
- Repeat Interval - set if the event takes place every (1) week/month/year or every second (2) or every third (3) week/month/year, etc.
- Repeat Until - set how long the event will be repeated
- Weekly Repetition Type:
- The same day of the week for each week? - set if the recurring event takes place only once in a week on the same day of the week as the start event date
- Which day(s) of the week? - specify the days of the week when the event takes place
- Monthly Repetition Type:
- The same day of the month for each month? - set if the recurring event takes place only once in a month on the same day of the month as the start event data
- Which week(s) of the month? - specify the weeks of the month when the event takes place
- Which day(s) of the week? - specify the days of the week when the event takes place
- Include specific days - to include specific days type newline-separated list of dates in format: YYYY-MM-DD
- Exclude specific days - to exclude specific days type newline-separated list of dates in format: YYYY-MM-DD
Event Publication Options
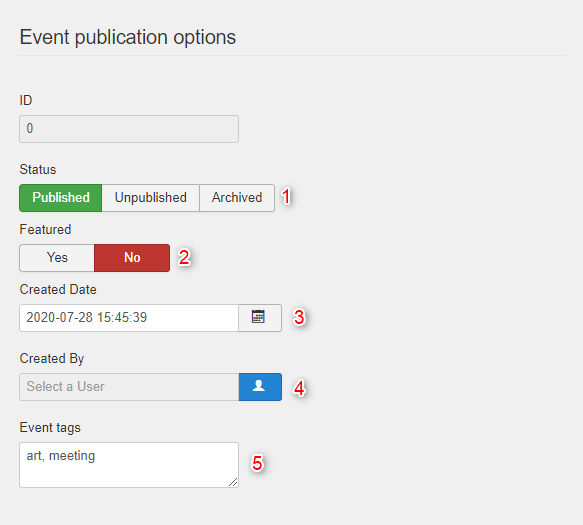
- Status - set the event status
- Featured - marked the event as a featured to promote it in the top of the events listing
- Created Date - The date of the event creation
- Created By - the user how created the event
- Event tags - comma-separated keywords matching the event description
- Now click on Save & Close
Step 4 - publish events
- Navigate to Menus -> Your menu -> Add New Menu Item
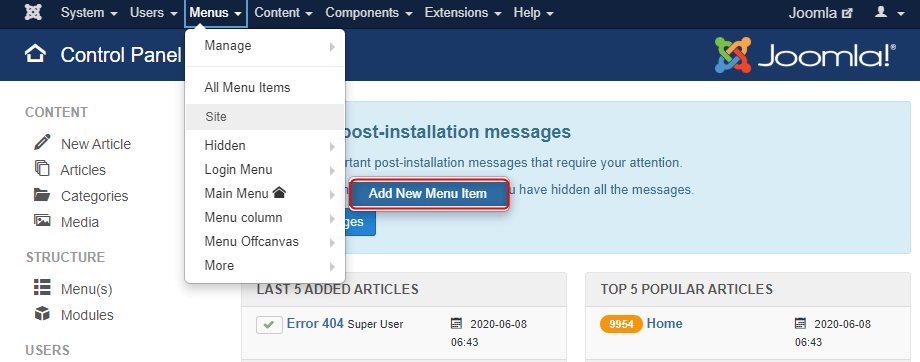
- Enter some name and click Select
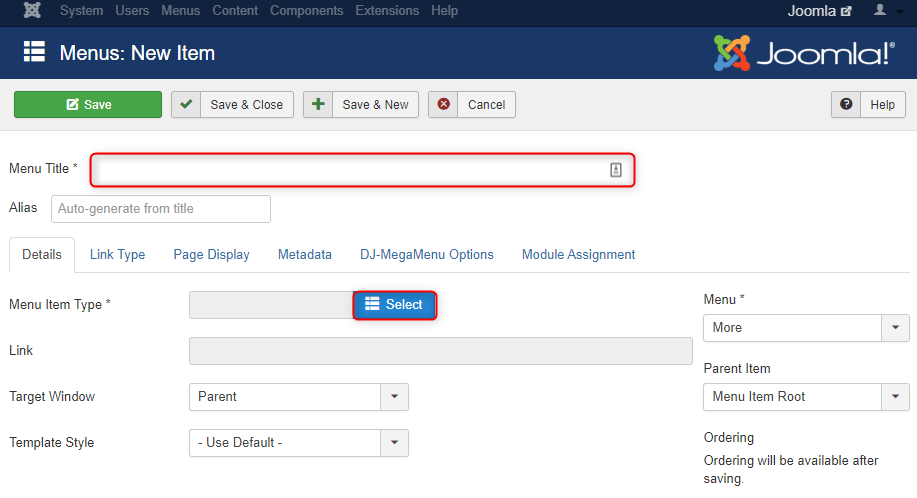
- There are a few views of DJ-Events. The most popular is the Events Listing View. Let's select it.

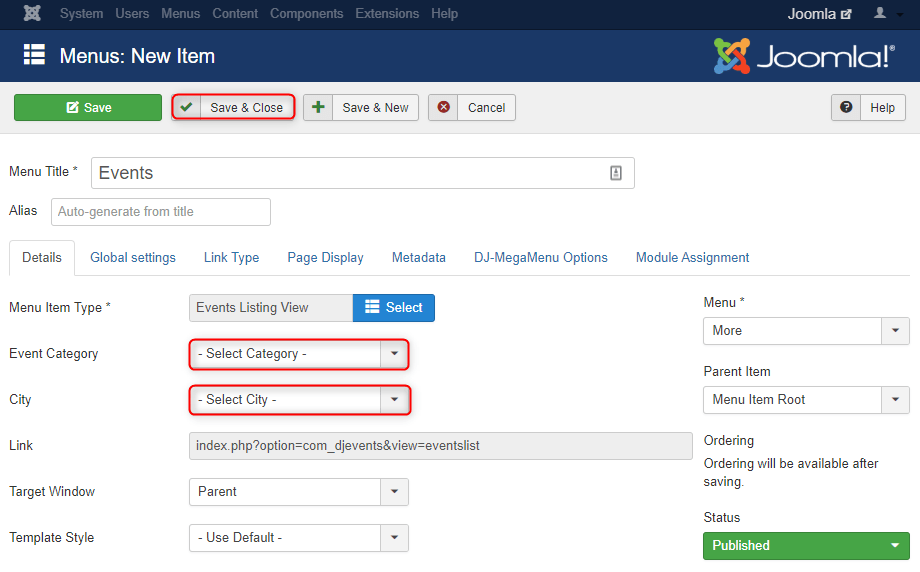
- Now click on Save & Close. Optionally you can filter by category and city.
Great. Now you can see your events by entering your new menu item. 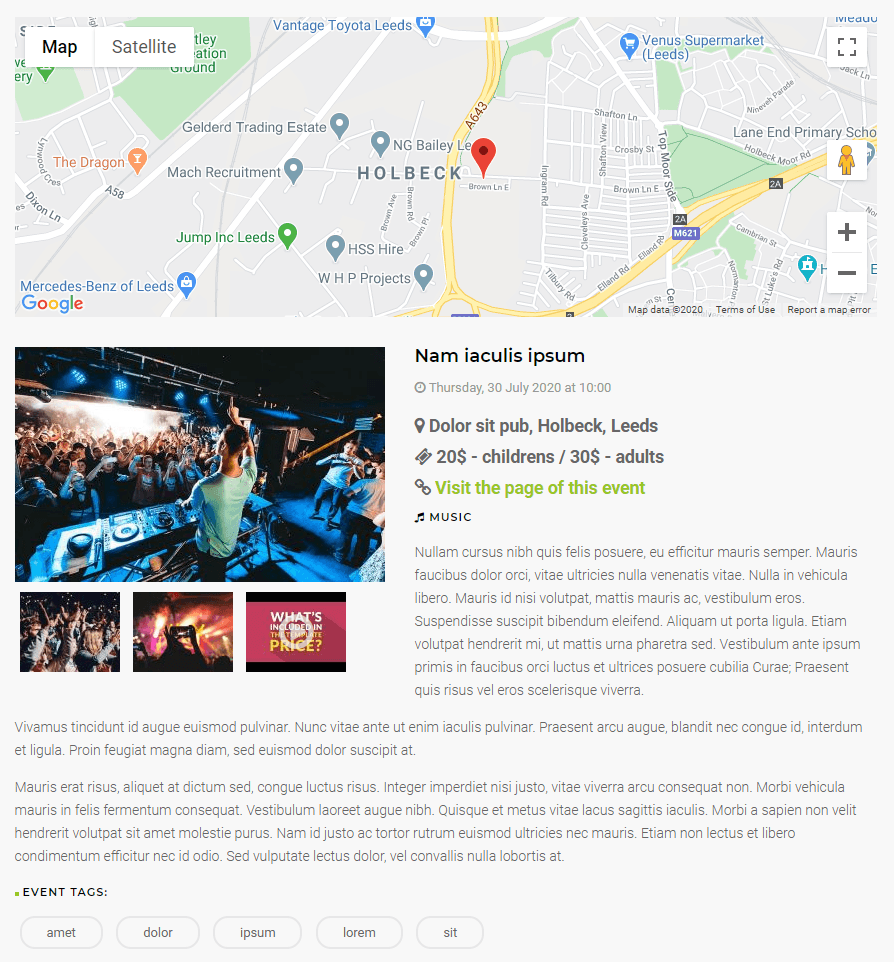
You can also use modules to show your events. Please check them:
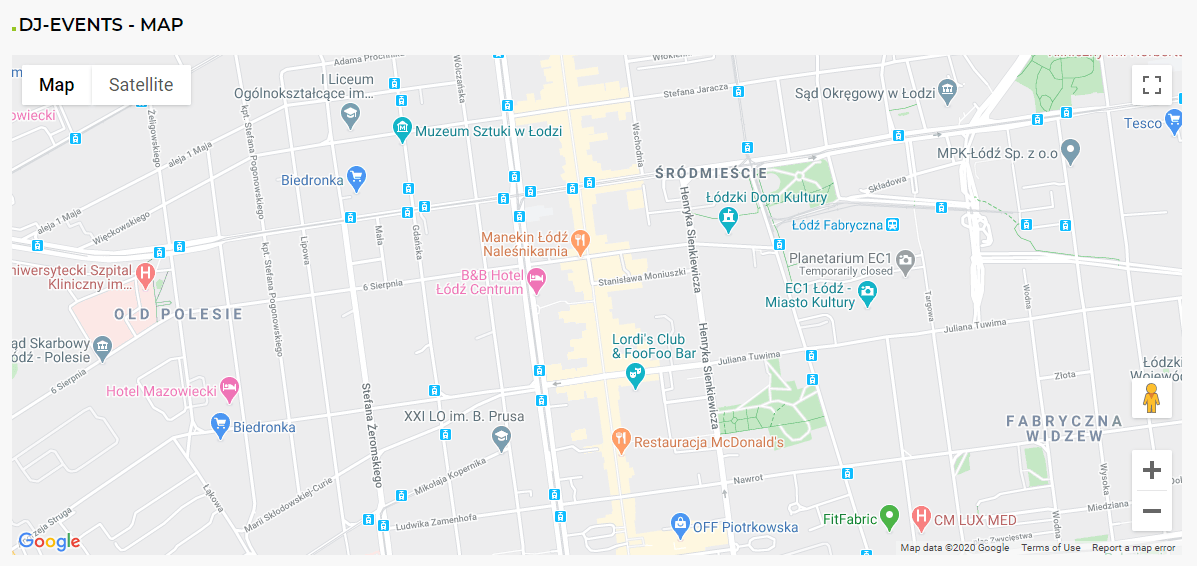
- Map module
- Search module

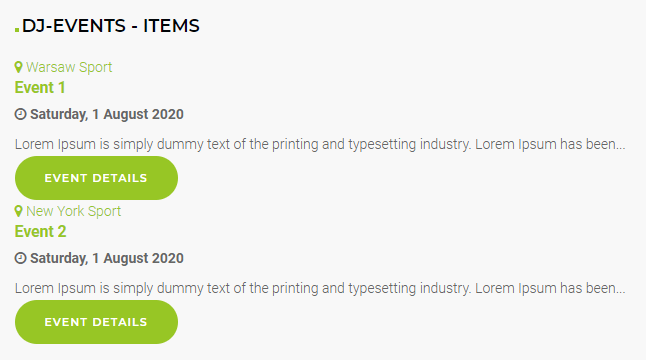
- Items module
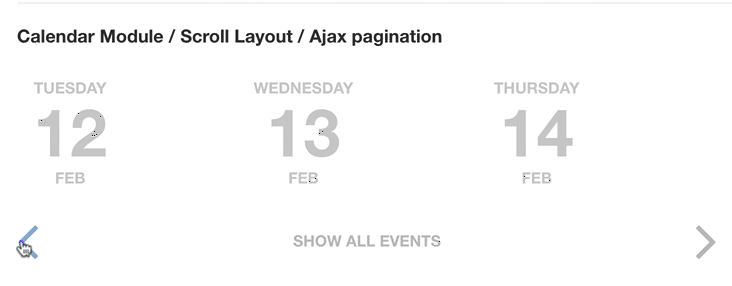
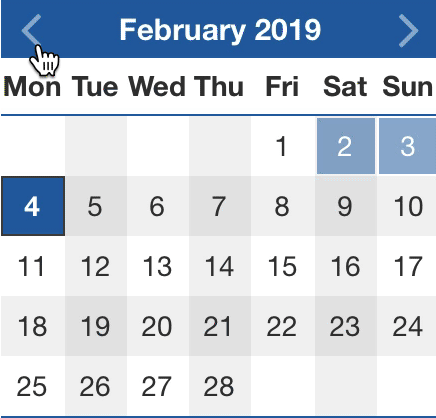
- Calendar module
Scroll Layout view example: